Your TV setup looks messier because of the cords. These low-cost fixes make them disappear
These common mistakes are ruining your home-viewing setup, but we've got some easy fixes.
If you buy something through a link in this article, we may earn commission.
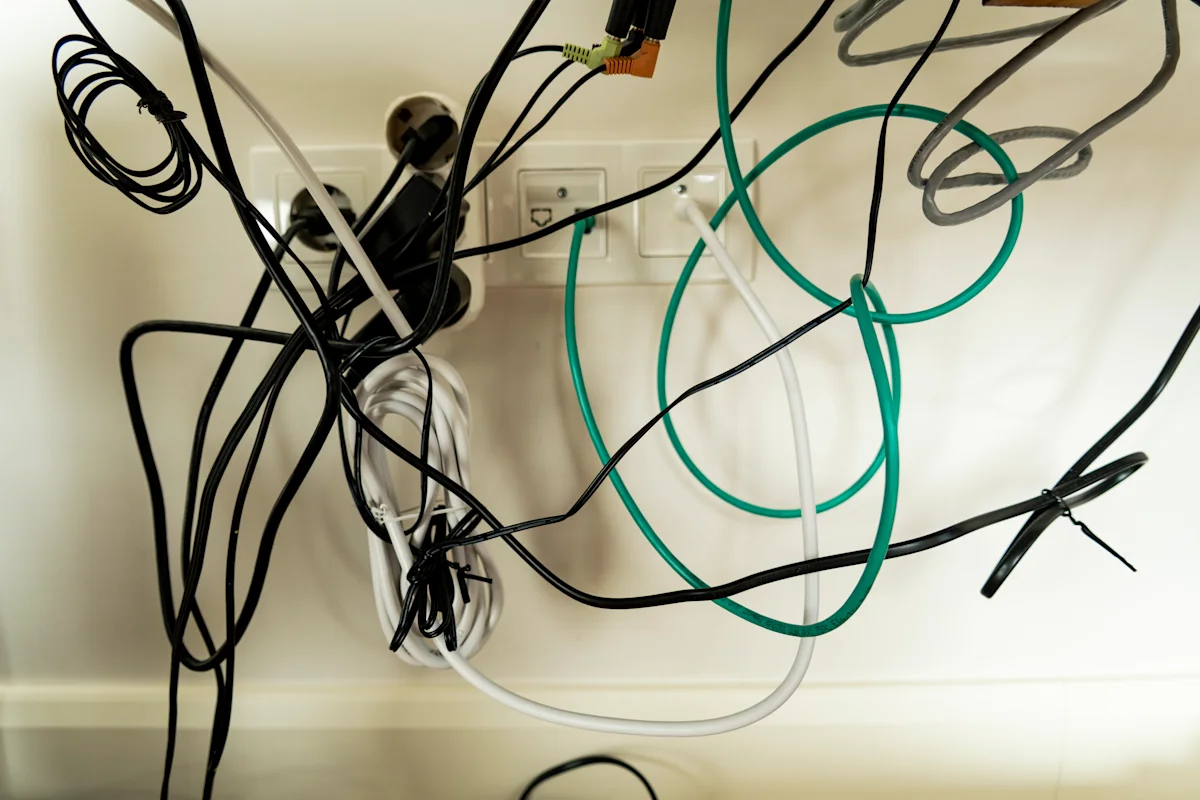
If your social media algorithm is full of amateur interior designers like mine is, you may have noticed that TVs have been catching a lot of shade lately — labeled as eyesores, vibe killers, the enemy of good design. I love interior design, probably more than the next guy, but let's get one thing straight: If your screen's an eyesore, it's because you hung it wrong. If The Starry Night were mounted 3 inches from the ceiling with cords dangling down, it'd be an eyesore too. And while that over-the-fireplace setup might look good on Instagram, it's a literal pain in the neck in real life. Luckily, a few smart fixes can solve your TV wire woes and make your setup look like a work of art.
I've covered tech for over a decade, and I'm also the guy who rearranges the rooms in his house every few months, whether they need it or not. That habit means I've dealt with more tangled cord chaos than most people see in a lifetime. Here are some changes that will turn your jungle of cables into something you never have to think about again.
We're fortunate to live in a world where (almost) everything is cordless. Telephones, internet, hedge trimmers... all of them used to have cords, limiting our freedom to walk around, but now we're free. Well, almost. Our TVs still need to be plugged into power and connected to gaming systems, streaming devices and some sound systems, but that doesn't mean we have to see any (or all) of those cables.
The cleanest fix is to run everything inside the wall, and you've got two ways to do it. The nicest looking (and the one I would choose) is a recessed outlet kit like this triple-outlet cable concealer. Instead of just hiding your power cables, it relocates a powered outlet up behind the screen, so your power and HDMI cords make a short hop into the wall and disappear. Some versions even add USB ports back there, which is handy for a streaming stick or a device that runs off USB power. Nothing dangles, nothing shows and you're not breaking any codes by running a proper electrical outlet where you need it.
If you want to spend a little less, a straight pass-through kit like this set does the job for a bit cheaper. It gives you two low-profile plates and a clean hole through the drywall, so you feed your cables in up top and pull them out down by your existing outlet. It works, and it hides the clutter. It's just a touch less elegant, since you're routing the TV's power cord and HDMI cables down below rather than installing a new outlet right behind the screen. For my use case, the power cord wouldn't reach, so this isn't an option. Measure and be sure before you buy.
One rule for both: never run a standard extension cord inside the wall. It isn't rated for it, and it's a fire risk. Use a kit made for the job.
When it comes to hiding cables in the wall, this is my choice, as it includes an outlet instead of solely being a pass-through for wires. This model includes two USB ports (one A and one C) in place of one of the power outlets, perfect for powering streaming devices, plus an ETL Certified 9-foot outlet extension. If you need more than 9 feet to reach your current power outlet, this model has a power inlet that lets you use whichever extension cord best suits your room and setup.
At roughly a third of the price of the cable concealer above, this pass-through is much simpler, as it just covers two holes in the wall. This style is best suited for TVs with an outlet directly below them, as you'll need to run your TV's power cable through the wall rather than use an extension cord. Never run an extension cord in the wall that hasn't been rated for that purpose.
Renting? Cutting into the wall probably isn't happening (or shouldn't happen), and that's fine. A paintable cord hider is your best friend here. It's a shallow channel that sticks to the wall, swallows your cables, and can be painted the same color as the wall, so it blends in. It won't vanish completely, but it gets pretty dang close.
No drilling, no drywall dust, no arguing about your deposit. When you move, you peel it off. This isn't a bad option for those who aren't keen on drywall sawing to begin with, renter or not.
Renting, or don't want to deal with putting a giant hole in your wall? This will clean things up nicely, without the mess, plus you can paint it to match the wall.
This is probably the simplest fix here, yet it is a mistake almost everyone makes: using the six-foot USB cable that came with your streaming stick when the outlet is a few inches away. All that extra slack has to go somewhere, and it usually ends up in a sad loop dangling behind the screen. Measure the distance you need, then buy a cable to match. A shorter cable keeps the run tight and leaves you nothing to hide. And just because your Fire TV Stick came with a long cable doesn't mean you're stuck with it. That's a plain USB cable — there's nothing special about it, so swap in the shorter one.
Forget the dangling 6-foot-long USB cable that came with your streaming device. Snag a much shorter one like this for a few bucks, and you won't have to figure out how you're going to hide it behind the TV. Before ordering, measure the distance between your HDMI port and USB port on your TV (they're usually close) to make sure this cable is long enough.
All but one of the TVs in my home sit flush to the wall, but if your TV sits on an angle in the corner of the room, or sits a few inches off the wall (more on that later), you might have enough room to tuck a slim floating shelf or device mount into that gap to hide a gaming console , streaming box, DVD or Blu-ray player — or even router — behind your screen.
It's a solution to the cable problem, but I'll be honest, it's not my favorite one. If you're still using anything with discs (like a gaming console or a Blu-ray player), you'll have to reach the thing to load it, and that means either ducking behind, reaching over or pulling the TV away from the wall every time. That gets old fast.
What I do instead: a low console sits directly beneath my TV and houses all the gear, with the cables running down through the wall so none of it shows. Everything's hidden, but I can still get to a device easily the second I need it. If you've got the floor space for storage, that's the setup I'd point you to first.
This adjustable mount can fit cable boxes, routers, even gaming consoles if you have room for them behind your TV.
Walk into any electronics store, and someone working there will steer you toward a full-motion mount with arms that swivel, tilt and extend. Most people never touch any of it. If you aren't planning to crank the screen around the room and don't need your screen tilted for any reason, a simple, fixed, low-profile flat mount keeps your TV tight to the wall, is inexpensive and looks better. Check, check and check.
It also pairs perfectly with the recessed cable kit . With the cords tucked into the wall, nothing's fighting for space back there, so you can hang the TV right up against the wall and get it sitting nearly flush, like framed art. That's not optional if you own an art TV, where the whole illusion falls apart the second there's a gap. The tradeoff is that this setup takes a little longer to get right. Don't let that stop you. As long as the thing is level (I've learned that one the hard way), a flush flat mount is the best-looking option out there. Measure twice, level thrice and drill once.
It may not look like much, and that's entirely the point. Install this wall mount into your studs (that's important), and it can hold up to 132 pounds, or a 95-inch TV. My 85-inch screen has been sitting on this one for months now, and I haven't had a single issue. Some tips: you'll want to invite a helper or two over to get the TV on the mount once it's installed, and while it does come with a small level, either a laser level or a longer 4-ft level is more helpful for installation.
The first few years after I bought my house, I dealt with buffering and poor resolution because the Wi-fi signal wasn't reaching my TV. At one point, I plugged my TV into a Wi-Fi extender via an Ethernet cable, which helped a bit with streaming but meant that I had yet another cable hanging down from behind the screen.
These days, I stick to wireless internet, thanks to a proper mesh Wi-Fi system and a gigabit connection. Sure, buying an entirely new router wasn't cheap, but I haven't had to deal with buffering in any room for years.
This three-node bundle is nearly identical to the Eero system I installed years ago, and the reason I love is it that you set it and forget it. Or, at least, that's been my experience; my home is blanketed in strong Wi-Fi signals, to the point where I rarely even open the Eero app. There's just no need.
While the wireless standard on this kit isn't the latest and greatest Wi-Fi 7 version, its Wi-Fi 6 speeds will be plenty fast for most real-world applications, including 4K video streaming. It's a bit pricey, but it offers double the bandwidth of the Eero 6 (non-plus) system.
Cables aren't the only thing making your TV unsightly. Once the cords are handled, you'll start noticing the other stuff, mistakes that were hiding in plain sight the whole time. Most of them have nothing to do with the TV itself and everything to do with how and where you put it.
One word of warning before you grab a drill. Sort out the placement stuff first. If you run cables into the wall and then decide the TV was too high or in the wrong spot, you're left patching holes and starting over. Get the height, location and the lighting right, and then hide the cords once the TV's landed where it's staying. Do it in that order, and you'll only have to cut into your wall once.
None of these fixes requires a contractor or a big budget, just a tape measure, a level, and the willingness to admit the setup you've lived with for years isn't actually working. I've made every one of these myself, usually more than once, so there's absolutely no judgment here.
No one likes sitting in the front row at the movies, craning their neck to see all the action. Why would you want to do the same at home? This problem is so common that there's literally an entire subreddit devoted to TVs that are too high , and it gets over 100,000 visitors a week. Your TV shouldn't be anywhere near the ceiling; watching at that angle every day is a fast track to a sore neck.
The fix: The middle of your screen should line up with your eye level while you're seated. That's usually around 42 inches from the floor, but the best thing to do is measure while you're sitting down. If you find yourself looking up like you're in the front row at a concert, you should lower the screen.
A laser level is a great way to make sure that your screen is installed not only at the right height, but nice and straight. Just set it to eye level while you're seated on your couch and let the laser do the rest.
Ah, the TV over the fireplace. Sure, it looks great on Instagram, but it's impractical in real life. Your neck won't thank you, and neither will your TV — heat and electronics don't mix. Next to the fireplace, on the opposite wall or even in the corner of the room (they make corner TV wall mounts for exactly this purpose) are all better choices.
The fix: Make the TV its own focal point and let the fireplace do its thing separately. Mine's currently mounted in the corner, closer to the fireplace than I'd like, but in a small room, you work with what you've got. If you have an outlet or insert above the mantel built for a TV, just remember this: You don't have to use it. Cover it with art or a mirror instead.
This mount can handle a TV that's up to 70 inches, and it will only set you back $30. That's much less than it'll cost to replace your TV once the heat from the fireplace gets to it.
Mistake: The lighting in your room is killing your picture
You know how it goes: Every time you sit down to watch, especially on a sunny day, glare from the window or bright overhead lights turns your screen into a mirror.
The fix: Try to avoid direct lighting whenever possible. Don't hang your TV at night — you'll want to see where daylight hits first. Ideally, mount it somewhere where glare isn't an issue at all, since angling the screen should be a last resort. Matte display panels ( like those on art TVs ) can help, but they're not magic. Blackout curtains or blinds work great if you can't find a glare-free spot. I'd also swap in color-changing, dimmable overheads and use lamps most of the time — harsh light kills the vibe.
I recently installed dimmable ceiling lights in my basement and I love being able to set the mood to just the right level. My next step was replacing my daylight-temperature can lights throughout the house with these smart options, which turned out to be the easiest electrical install I've ever done. Just pop out the old fixtures and connect the new ones. I had four lights done in under five minutes.
Mistake: Your TV is too small for your space
You went too small, and now you've got a screen floating on a giant wall looking like a sad postage stamp. Even a 43- or 50-inch TV can feel tiny depending on the room or the wall you mount it on. And if you're sitting far away, size matters even more.
The fix: In the not-so-distant past, a bigger screen used to mean a bigger budget. That's not the case now. You can get a 65-inch 4K screen starting around $240 (that's less than what I paid for my 32-inch, 720p, not-smart TV in college). The most important factor? Viewing distance. To find the minimum size you're looking for, divide the viewing distance in half. Is your couch 8 feet away? You'll want 48 inches or larger. Want a more cinematic experience? Size up from there.
I reviewed the 85-inch version of this TV earlier this year and had a slew of good things to say, especially at this price. It doesn't ask you to compromise on size to stay in budget. It just asks you to be honest about what you're buying. This is a big-screen TV built for people who want to go large without the financing plan, and at this price point, nothing else comes close to the real estate it delivers.
This 65-incher isn't quite as large as the one I tried, but it's also a few hundred dollars cheaper. For just $240, you get a 4K picture and HDR 10 for brighter brights and deeper darks. It's a smart TV that uses Amazon's Fire TV interface — if you've used Amazon's Prime Video app, you'll have a fairly good feel for the navigation. The remote is small, but it has Alexa built in, so you can control the TV with your voice.
If you really want to make a statement, turn that black box on your wall into a piece of art, with the frame included. "Hisense's first-ever art TV was very good when it debuted in 2024, but a few key software updates have made it even better," our tester says. "This is now without question the best budget alternative to Samsung's venerable Frame TV. "
The TV gets all the credit, but in reality, sound does most of the heavy lifting. Unfortunately, the speakers built into pretty much every TV are… not great.
The fix: A solid surround-sound system with a subwoofer can pull you right into the scene, though even a simple sound bar setup can prove to be night and day for your ears. Plus, with crystal-clear audio comes the benefit of not having to keep the subtitles on all the time, unless the movie is British. (I can never understand what they're saying on The Great British Bake-Off. )
When I first entertained the idea of a sound bar, I'll admit I was skeptical — was this something I really needed? I figured my TV speakers were fine and that a sound bar was just another gadget taking up space under the screen. Then I tried one, and it completely changed how I watch everything. Even a budget setup can transform your living room into a mini theater. This combo delivers dialogue enhancement, so you can watch your favorite movies and shows sans subtitles, and is easy to install — no crawling through an attic or running wires across the floor like it's 2002 — all for under $100.
If you budget stretches a bit further, upgrade to a full Dolby Atmos 7.1 surround sound system . It is the best entertainment upgrade you can get, especially if you're still listening to the built-in speakers.
This sound system takes over where its predecessor, one of our favorite sound systems , left off: delivering big, cinematic sound without the big price tag. You get true Dolby Atmos, a wireless sub that rumbles and a setup so simple it feels unfair. Roku TV owners get extra perks too, with seamless integration and all the controls right onscreen. For $200, it's the best audio experience you'll get without buying a full surround system.
If you have Amazon Prime , you'll get free shipping, of course. Not yet a member? No problem. You can sign up for your free 30-day trial here . (And by the way, those without Prime still get free shipping on orders of $35 or more.)
The reviews quoted above reflect the most recent versions at the time of publication.
Topics in this story
Gathered from external sources. Rights to this text belong to whoever originally published it.