Chapter 6 Walkthrough -Tranquility - Final Fantasy Resonance Guide - IGN
The sixth chapter in Final Fantasy Resonance brings Rain and the party to the miasma-ridden landscapes of Gronoa, one of the largest continents in Lapis. With
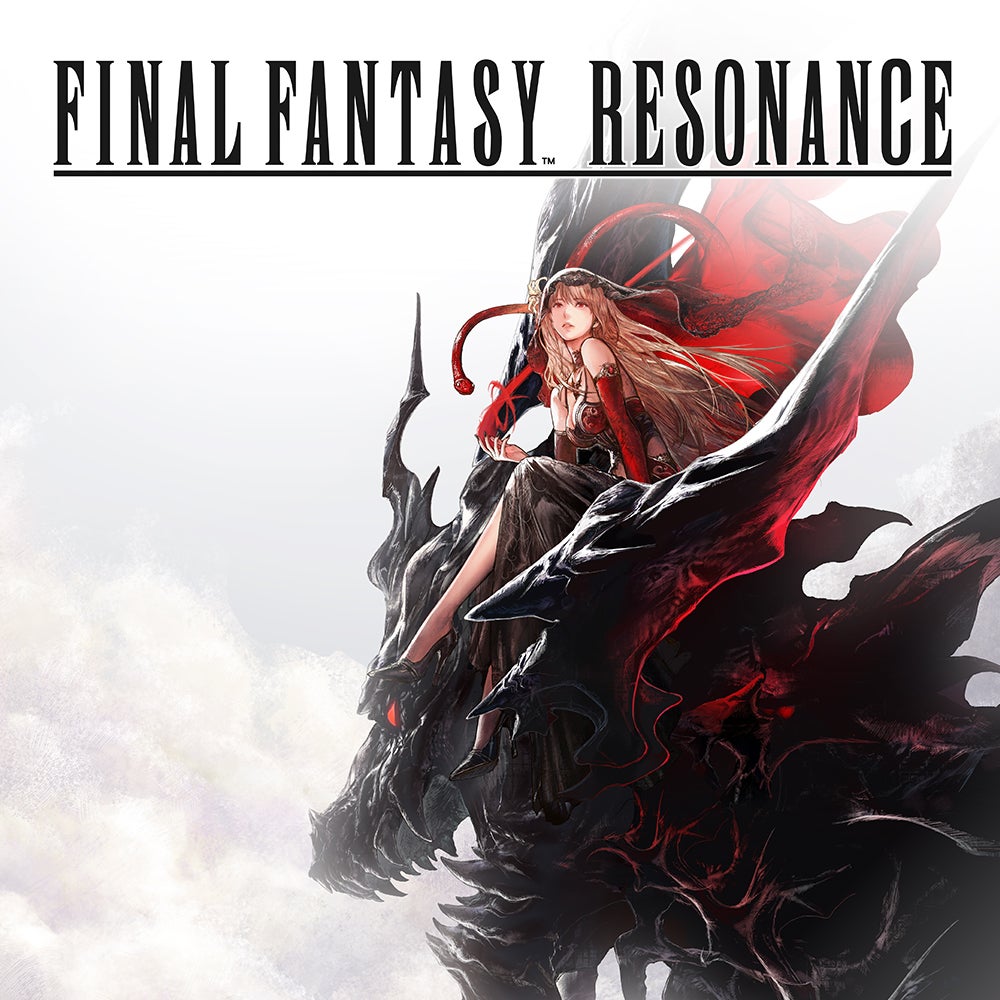
The sixth chapter in Final Fantasy Resonance brings Rain and the party to the miasma-ridden landscapes of Gronoa, one of the largest continents in Lapis. With only the Dark Crystal left intact, the party is under more pressure than ever to save their world from catastrophe, though Sakura pulls the curtain back on the Sworn Six's true motive for destroying them.
Here's how to complete Chapter 6 in Final Fantasy Resonance, including all major objectives, boss encounters, and points of interest along the way.
The next chapter picks up right where Rain's flashback left off, having given the devastating truth about his mother's fate and his father's supposed hand in it. He believes that Raegen didn't kill her himself, but that he wasn't absolved of responsibility for it. That was also when Raegen mysteriously vanished, leaving Rain and Lasswell to take care of themselves.
The party gathers up in Sakura's house and Rain says that he has a theory about Paladia and its existence in their world of Lapis. If crystals only existed on Paladia, then having crystals on Lapis wouldn't make sense. After witnessing the final events on the battlefield in Fina's psyche, Rain surmises that at least part of Paladia was somehow sent to Lapis, along with the crystals. This means that the land they're standing on now is technically Paladia.
Sakura confirms his suspicions and says that she'll provide more context as they travel to the continent of Gronoa , the home of the Dark Crystal, the only one left now. It's due west of Dirnado, so it's time to head back to the Enterprise. Save your progress at the Save Point inside Sakura's home, then tie up any loose ends you have in Mysidia.
When you're ready, leave the city and return to your airship. Once aboard, fly up to the northwestern side of Lapis where you'll see a massive continent surrounded by a wall that doesn't allow you to fly over it.
As you approach, you'll get a cutscene with the party aboard the ship. Sakura goes into further detail about what truly happened in Paladia, that a part of it did indeed end up in Lapis because of a gate that was opened on the planet after the Eight Mages of Hess were sealed.
She explains that the highest powers of Paladia had contempt for the influence the Sworn Eight held over the people of Aldore, and that influence would be unwavering if the war was won thanks to them. To stop that, they opened a gate on Paladia and sealed the Sworn Eight inside crystals. Those crystals traveled to Lapis along with remnants of their world. This explains Umbra's mention of a "betrayal".
Thus the Sworn Eight were estranged from their homeland, and the crystals traveled with them where they wound up in shrines on each respective continent and turned into idols of worship.
During their conversation, a purple fog descends onto the airship and Archwitch Fina warns that it's miasma. It forces the party to land in a safe location on Gronoa, and soon you'll touch down on the overworld.
Tip: During this chapter, Gilgamesh will surprisingly be hanging out on the deck of your airship! Approach him and you'll end up in another duel against him, though the main challenge of it are the minions he summons rather than him. Win and he'll give back the Genji Gloves (boosts Critical Hit Rate by 50%) he took from you at Siren Tower! You can also get his Battle on the Big Bridge Subquest , too.
Head through the one entrance into the continent's mainland. The region is massive comapred to other continents, and chunks of it are covered in that same dangerous miasma. For now, just go straight ahead until you arrive at the entrance to Gaberada, the Undertown.
As the party arrives, Rain marvels at how such a town was built underground. Jake suggests they go find out some intel about the island's miasma so that they can learn how to deal with it on their travels. Once you have control, feel free to explore the area first. You'll find the local shops over to the left, which are filled with some hefty gear upgrades for your group. They do come with a steep price tag, so choose the ones you want most first.
Tip: Enjoy this little Resident Evil 4 easter egg!
Just about every weapon in the shop is well worth the purchase as they each have a valueable perk along with impressive stats. The same goes for the armor, so consider grinding to save up for most of these options while you're in Gronoa. Elsewhere in the town, make sure to pay a visit to an elven woman near the Inn to get the Reunion Sub-Quest . Also, there's a treasure coffer up in the northeast corner of the town that contains 3 x Fuma Shuriken .
Another treasure coffer west of the Shops building contains 1 x Phoenix Pinion .
When you're ready, head to the building on the north side of the town. Grab the Tablet Shard on the ground on the right side of said building, then head inside. Speak to the Village Elder and you'll get a cutscene where she asks why you've come to a place like Gronoa. Rain vaguely explains that they're looking for something on the continent and the woman suggests they think otherwise due to the miasma that's infected the lands, particularly on the east side of the continent. Rain insists that they don't have a choice in the matter, and the woman then reveals that there is a way to dispel it, albeit a difficult one. She says that one of you needs to learn a spell called Holy and sets her sights on Fina, claiming that she looks able to handle it. To complete that process, however, you'll first need to gather something for her that's found outside of Gaberada to the east. Specifically, it's a white jade stone.
With that, it's time to go on the hunt for one, so go and save at the nearby Inn, then leave Gaberada when you're ready.
Once back in the overworld, check your map and your objective is off to the northeast. Take the east path from Gaberada and follow it up the hill to a run down facility called the Research Center Ruins . Head inside.
A cutscene plays as the party enters the facility, and Sakura realizes that it's an Aldorian research lab. She further explains what the ulterior motive of the Sworn Six is in regards to them destroying the crystals.
The gate that once swallowed part of Paladia into Lapis wells up with magical energy and must expend it once every century. That moment is fast-approaching again, hence the appearance of shooting stars in the night sky and the Sworn Six moving rapidly from one continent to the next. Furthermore, they commandeered The Invincible to ensure they can return to Paladia safely. Sakura warns that opening the gate will result in a cataclysmic reaction that will tear the land of Lapis asunder. WIth the Dark Crystal the last remaining obstacle between them and the opening of the gate, time is even more precious now. Once you have control, pick up the Level 1 Lab Key Card off the floor to your left, then go save your progress at the Save Point to the right. Use your new access card to go through the door on the left (you don't have clearance for the other two doors yet). Run right through the room ahead (the lab room in there requires Level 2 clearance) and go immediately to the next exit. In the next room, pick up the Tablet Shard on the floor by one of the desks, then go over to the green portal on the left side (seen above). This will teleport you to a room full of shipping containers. Make note of the portal in the center of the room. First, go climb up the ladder onto the shipping container on the bottom-left side to open the treasure coffer there for 1 x Lightning Scroll II .
Now your objective here is to power up the center portal by activating all three consoles in the room . Examine the one on the left side of the room first. Next, go activate the one in the center-south area between two containers (seen above). Finally, to reach the console in the bottom-right corner, you'll first need to run to the north side and climb the ladder onto a shelf. From there, follow the makeshift path south to the blocked off area where the console is. Grab the Tablet Shard on one of the shelves down there, then climb down the nearby ladder to the third console.
Tip: While you're up there, make sure to open the treasure coffer also on the north side for 2 x Mist Turbo Ether!
Activate it and then backtrack the way you came to return to the portal in the center of the room.
Tip: Also open the hidden treasure coffer on the right side of the room between a couple of shelves for an Arcane Long Rifle weapon for Jake.
Use the now-active portal to be sent to the next area, which is a small room. Pick up the Level 2 Lab Key Card from the desk in there, then leave through the gate. Return to the starting area and save your progress. Now use your Level 2 card to unlock the door on the right side and head through. In the next area, you'll find yourself in a room full of green teleport portals. Start by using the one directly ahead of you to reach the center area of the room. Open the treasure coffer in the top-center of the room for 3 x Unicorn Horn . Next, use the portal near where that coffer was to be sent to the bottom-right section of the room. There are two other portals here to choose from. Take the right-side portal to be sent to the next section up.
From here, use the left-side portal to be taken to the top section. Finally, use the left-side portal again to be taken to the closed-off area where the ladder is. Climb it up to the elevated level above.
Tip: There's a Magic Pot off to the left in this area if you're feeling generous!
Grab the Tablet Shard from the edge of the broken path in the middle, then take the path left of that one all the way down until it leads you to a small lab room. However, before you do, pivot right at the bottom and go open the treasure coffer on the broken path in the middle for 1 x Magicite .
Now go into the room and grab the Level 3 Lab Key Card from the desk in there. Take the nearby green portal and you'll be sent back to the bottom of the previous room, albeit on top of a shelf. Lower the ladder on it and climb down to the floor. Take the left side exit back to the starting area.
Rest in a Tent at the Save Point and save your progress. Now use your Level 3 card to unlock the north-side door and head through. In the next area, take the elevator down to a lower level and run into the next room. There you'll find a lab full of the White Jade Stones you've been looking for. Interact with the one on the center table to get a cutscene. Rain takes the stone and Fina suggests they head back to Gaberada. Before they can, however, a strange figure emerges through a door and Rain immediately recognizes him as Elfdrit from Fina's psyche. However, he clearly doesn't look well as he wanders through the room like a zombie. Fina muses that the same could have happened to her if Rain didn't save her. Rain asks if she's alright and Fina chuckles, asking if he's worried about her. You'll then get a Dialogue Choice to make from the following options. Choose wisely.
Afterward, Fina reminds the group of the task at hand and that they need to stay focused. With that, you're free to leave the facility, so leave the room and exit via the entrance area. Either fast travel back to Gaberada or hoof it if you feel like grinding more levels.
Once back in the underground town, head to the north side house and speak to the Village Elder once more. Pleased with your efforts, she says that she'll need to train with Fina until morning in order for her to master the Holy spell. Rain suggests they stay at the Inn in the meantime. The scene then shifts to Lasswell as he continues his personal training alone. At one point he notices something different in his swing, and he takes a moment to hone his senses. In a flash, the nearby giant stone turtle shell is cleaved in half. This leaves Lasswell speechless, and the scene fades to black as the party automatically rests for the night.
The next day, the group reunites in the town center and Rain suggests they go see about picking up Fina. He notices Lasswell lost in thought and asks if he's already. Lasswell brushes it off and the scene ends. Head to the Village Elder's house and speak to Fina inside for a cutscene. As hoped, the training was a success and Fina can now wield Holy to get the group through the miasma bog. Make any purchases you want at the local shops, save, and then leave the town. Head to the objective marker just off to the left in the overworld and Rain will ask Fina to do the honors. She then uses Holy and the miasma is dispersed, leaving the path ahead cleared. Sakura notes that the Gronoa Shrine is through a rugged mountain pass to the west.
In the area newly freed of miasma fog, start by running to the right first and grabbing the item off the ground at the dead end. This gives you the Brigand's Gloves accessory, which improves the odds of Steal.
Now pivot and head west as instructed. until you reach the cave entrance to the Rugged Mountain Path . Head inside.
As the group enters the area, Sakura notes that the Gronoa Shrine is at the end of the pass. Nichol then asks her for more information about how Paladia merged with Lapis. She mentions that people from Paladia were forcibly sent to Lapis too, and it created unrest for some time before the natives of Lapis learned to live alongside them.
It also ties into how Visions are able to be summoned. Lid asks further about the Eight Sages who were sealed, and Sakura simply says that they must all be free like Archwitch Fina, though the ones who came from the Lightning and Ice crystals have likely passed. The conversation then comically pivots to how Archwitch Fina chose the path of love rather than vengeance, and this catches Rain off-guard. Despite her hints, he hilariously doesn't seem to catch on. Meanwhile, Fina appears lost in thought before the scene ends. Once you have control, go and save your progress at the Save Point just south of you. Grab the Tablet Shard off the ground just to the left of there as well. Now make your way up the mountain path to the north. At a certain point not too far ahead, pivot to the right and take the hidden path that leads to a treasure coffer on the edge of a narrow cliff (seen above). Open it to get a Kumobashiri weapon (grants Haste for 3 turns at the start of battle) for Lasswell.
Backtrack to the main path and open the treasure coffer directly ahead of you to get 1 x Adamantite . Pivot left and then north again up the path. Keep following it to another semi-open area where there's another Tablet Shard on the ground in the top-right corner. Grab it, then head west to the next Save Point.
Open the hidden treasure coffer behind the boulder near the Save Point to get 1 x Flame Scroll II , then go save your progress. Cross the bridge to the south and you'll get another cutscene with the group. Lasswell takes a playful jab at Rain for fighting "slower" than usual, which leaves Rain confused. The exchange leaves an awkward silence between then while Fina, Lid, and Sakura discuss more about Paladia. Soon the scene cuts to a flashback with Raegen and Sakura departing from the Sworn Eight after ending up on Lapis. Lux catches up with them and demands to know why they're betraying their oath of vengeance. Raegen says that he'd prefer to lay down his arms and lead a peaceful life than continue to be a tool of war as Paladia wanted. The emotional scene ends with Lux in tears as the two of them leave. Back in the present, Fina surmises that Lux had feelings for Raegen back then, an unrequited love. As the trio discusses it, a portal suddenly opens and reveals none other than Lux herself. Still unshaken in her quest for vengeance, she seeks the Dark Crystal just as they do, and holds no qualms about cutting them down to get to it.
With that, a battle begins with another of the Sworn Six.
The core of Lux's arsenal is Light-type attacks, so as you can guess, her main weakness is Dark magic. Make sure you've come well-equipped with Visions that wield it (Shantotto and Cecil are optimal choices) along with gear imbued with strong magic defense stats.
Lux will open with some particularly punishing Light-based attacks, such as Atomic Ray (single-target), Luminant Cannon, and Luminant Purifier, a devastating party-wide attack that you'll want to promptly heal from. Lux also applies various buffs to herself with each turn, so make sure to use Dispel and/or Sakura's Magicide to get rid of them.
Vice versa, Lux will also remove YOUR buffs IF you cast them on the ENTIRE party, so be mindful of how you apply buffs and to whom. Accessories and gear that come with inherent buffs are a key method to bypass this, and stick to spells that apply single-target buffs rather than party-wide (in other words, avoid Nichol's Bulwark, Shellga, Hastega). While slow and steady may work in other challenging fights, your goal here is to end the fight as quickly as possible, as most of Lux's attacks are too painful to take long-term (even if you're properly leveled). Have Archwitch Fina and Sakura serve as your primary Dark damage dealers, and focus down Lux's stagger meter every chance you get. Meanwhile, use Nichol to stay on top of bulk healing with Leah.
Once Lux is staggered, her biggest attacks will be out of commission, so burn your absolute strongest attacks during this phase. While non-elemental, Sakura's Ultima Limit Burst will still devastate Lux's HP, so consider saving her meter for that opportunity. Once Lux is defeated, you'll receive a Halo Ring as a reward, and a cutscene will follow. Falling to her knees, Lux remarks how Rain fights so similarly to Raegen. She then staggers backward until she falls from the cliff behind her. Sakura assures that thanks to their forced immortality, such a "tumble" won't kill her. She then mentions a town near Gronoa Shrine and suggests they make a pit-stop there.
Once you have control, continue along the path to the left and then south to exit the mountain pass. You'll then be back in the overworld. Head south until you get another cutscene where rain starts falling on the party as they cross the landscape. Realizing it's also tainted with miasma, they opt to hurry to the town ahead. The scene then pivots to Lux, who recovers in the canyon below the cliff where she fell. The rain fills her with contempt and leads to a flashback, to the day she confronted Raegen about abandoning their cause. During their argument, Sophia approaches and demands that the fighting stop, asking Lux to leave them be. Refusing to leave Raegen behind, Lux demands that he fight her and readies an attack as a threat. However, Sophia steps in and takes the blow for Raegen, leaving Raegen devastated and Lux speechless. She insists that it wasn't meant for Sophia, but Raegen simply picks her up and carries her home. Back in the present, Lux laments that she could never replace Sophia in Raegen's heart, and that now revenge is all she has left. With that, she gets up and leaves.
From there, the party rests and the next day arrives.
Rain emerges from the Inn in the Town of Duggle, the town near Gronoa Shrine. Sakura greets him and suggests they head to the shrine now while there's still time. Double back into the Inn and save your progress, then feel free to explore the town before you go.
Take the nearby bridge north and there's a Tablet Shard on the ground on the other side by a waterfall. The shops are on that side as well, and they have some good weapon/armor upgrades if you've got the Gil.
Tip: Keep going left past the entrance to the shop and there's a hidden passage that leads to a treasure coffer in front of a waterfall nearby. Open it for 2 x X-Potion.
When you're ready, leave the town via the exit to the west. This brings you back into the overworld of Gronoa, and from there you'll want to head south and then west at the signpost .
Tip: The signpost will also indicate that the Sanctissimus Shrine is to the east, but if you attempt to go there, Sakura will deny you access by pointing you back in the direction of the Gronoa Shrine, so don't bother hoofing it all the way over there right now.
Across the bridge ahead is the Gronoa Shrine. Detour around to the south side of that area first and there'll be an item on the ground near the cliff that gives you the Anatomy of Magic (inflicts Deshell on a random enemy at the start of battle) weapon for Nichol. Now head into the Gronoa Shrine for an emotional cutscene.
As the group enters the shrine, they find Lux collapsed on the ground, clearly having fought someone else on the way to the crystal. Sakura tends to her but Lux fends off her concern. They ponder who could have brought Lux down, and Elfdrit comes to mind. However, before they can continue in pursuit, Lux still refuses to relinquish her desire for revenge. She even admits to having killed Rain's mother, thinking that he'll seek the same revenge now. However, upon hearing that it was an accident, Rain partially forgives her and explains that he seeks to stop the Sworn Six now out of principle rather than revenge. Having learned far more about them, he feels empathy and understanding for their situation, and has Lux face the fact that they're really not much different from eachother. Shaken by his words, Lux still seeks a fight and demands that he face her, gun outstretched, an echo of the past with Raegen. However, she can't bring herself to do it, and the group then leaves.
Once you have control, save at the nearby Save Point, then continue north and take the stairs down to the next area. In the next section, grab the Tablet Shard on the ground nearby to your right, then take the right-side stairs first down to a treasure coffer. Open it to get 1 x Mist X-Ether . Backtrack up and then take the left-side stairs this time. Follow the path south all the way to the next level down. Pivot left and open the treasure coffer at the far-left end of the path on that side to get 1 x Magicite Cryst .
Now go to the right, all the way until you can go halfway up a stairwell. Grab the Tablet Shard from there, then backtrack down to take the path on that side to the north. On the other side, take the ladder down to the lower level. Ignore the stairs for now and run to the other side of the platform. Take the ladder on the far left side up to another section of the upper level that was inaccessible. Go open the treasure coffer to the right to get a Rod of Focus weapon for Sakura, then go grab the Tablet Shard on the ground by a fallen column in the same area. Backtrack down the ladder and back to the right to go down the stairs you passed before. Follow the path down to an elevator left you can take to the bottom level, where the crystal chamber lies just ahead. Save at the Save Point there (use a Tent to refresh if you have one), then head towards the chamber for a cutscene. As feared, the party comes across Elfdrit who remains transfixed on the goal of freeing his brethren from the final crystal. While she sees that his kindness remains, Archwitch Fina says they need to stop him no matter what. With that, a battle begins against an old friend.
As an undead humanoid monster, Elfdrit is naturally weakest to both Light and Fire magic, so make those your focus here. If you have Ifrit unlocked, he's an ideal Esper to summon for this fight.
Elfdrit has an unexpected gimmick which is that upon enraging, he'll use Recuperate to completely replenish his stagger meter. However, this does NOT replenish his health at all.
While you can try to beat the clock before he uses it, your better bet is to just focus on heavy damage with your best mages and Visions that specialize in Fire and/or Light magic (e.g. - Onion Knight, Terra, Warrior of Light).
Elfdrit will start the fight by using Silencega to try and cripple your magic users from the get-go, so use means to counter that through accessories or items. He'll also use Venom Breath to try and inflict Poison on the group, along with Graviga and Darkga as his main offensive spells. He'll also sneak in more minor attacks like Leech and Paralysis Slash occasionally.
Otherwise this fight is pretty straightforward. Once he's felled, you'll get hefty EXP and Gil as a reward, but no items to claim. In the following cutscene, Elfdrit will retaliate by trying to unleash all of his magic at once, which Archwitch Fina warns will likely vaporize everything around them, the crystal included. Sakura rushes forward to try and stop him, but suddenly a bright blast from elsewhere flies through and hits Elfdrit. With a flash, his body disappears, laid to rest at last. Lux appears behind them and Rain asks why she saved them. She recalls his words from earlier, and those of Raegen's from years ago. She now understands that life is about more than revenge, yet she still desires to face them in a fair fight before seeking what could lie beyond. With that, she leaves the shrine. Before the group can enter the chamber, however, a voice booms through the room and says that there is no crystal within. The spirit of Gelidus then appears, and Sakura asks what he's done all these years. He remarks that he's relocated the crystal to Sanctissimus Shrine to east, and they'll need to prove their worth to approach it there. He then vanishes, and Sakura notes that they'll need to see for themselves what else lies inside, that it's better shown than explained.
Once you have control again, either take the elevator lift to the right or use the Save Point to teleport back to the entrance. From there, leave Gronoa Shrine and start your trek to the east. Cross the bridge that least to the east side of the continent, and follow the path to a similar-looking shrine. Go inside and you'll be greeted with a cutscene.
As the party takes in the sights of the shrine, Rain muses how Lasswell's gotten much stronger recently. He approaches him and they discuss the duel they promised to have when everything's said and done.
Lasswell chides him for not realizing the ramifications of truly losing, which Rain's never experienced. However, Rain takes it in stride while Lasswell walks off, thinking to himself about what's lost when power is gained.
Once you have control, head up the stairs ahead and through the large doors. Ahead, the party finds a strange-looking monster blocking their path, and Rain suggests they need to strike it down to progress. However, Sakura urges them to wait and examine the stele nearby for hints. She further explains that this shrine is designed to provide challenges for those who wish to become a Paladin and access the inner sanctum, where Gelidus is likely keeping the Dark Crystal.
As expected, this means you'll need to fight your way to the crystal chamber, albeit a bit differently than normal. Once you have control, use a Tent and save your progress at the nearby Save Point, then approach the monster on the platform ahead.
The gimmick of the fight against Archaeoaevis is that its elemental weakness will constantly change, so keep that in mind as you deal damage. It will start with weakness to Wind, so focus your best Wind attacks before it shifts. When it does, it will use Barrier Shift, so watch for that on its turn.
Along with powerful offensive magic tied to its current element, it will also use regular physical attacks like Rend and Thwack, so don't let those catch you off-guard. Hastega and/or Unity can help get you more hits in with each elemental shift, and half the time you're likely better off not bothering with spamming Libra each time. Just wait to see what element it uses and deduce its weakness from there.
Once felled, you'll be clear to move on to the next section of the shrine. Double back to heal and save at the Save Point before you do. In the next room you'll find your next adversary, a Dad Bomb. Read the stele beside the platform, and it alludes that you'll need to watch out for its biggest attack. Jake hits the nail on the head by saying that its self-destruct attack is the answer to the riddle.
With that in mind, approach the Dad Bomb and get ready to fight.
Contrary to traditional bomb enemies, Dad Bomb is weakest to Fire damage and resistant to Ice damage, so it's time to bring out your biggest fire wielders. Ifrit works well here too, if you have him unlocked for Fina.
Dad Bomb uses a combination of punishing Ice attacks such as Blizzaga and Absolute Zero, which flog the entire party for significant damage, so make sure to get Shellga up (or Bulwark, at least). However, it'll also use an array of physical attacks that hit hard as well, such as Charge and Fist of Fury, which target a single party member. Meanwhile, Thwack will hit the entire party for multiple hits, so make sure to stay on top of your heals.
The gimmick behind this fight is that it's basically on a countdown timer until Dad Bomb uses its Self-Destruct attack. As turns progress and you inflict damage on both its HP and stagger meter, Dad Bomb will become progressively angrier, which will be indicated by different messages. It starts with "Dad Bomb is internalizing his fury" and continues up to "Dad Bomb has had enough", which is essentially your final warning.
Your goal here is to defeat Dad Bomb before Self-Destruct happens, so make sure not to waste turns with non-essentials, and stay consistent with your biggest Fire attacks.
Once defeated, the door ahead will be accessible, so head through. In the next room, you'll find yet another monster. Inspect the stele to the right for your next hint, which indicates that it will be "serene" one moment then unleash its fury the next. Save and heal up at the nearby Save Point. When you're ready, approach the beast for your next encounter.
Test Rider will start the fight by activating Rage, which amplifies its Physical and Magic Attack power significantly. As such, you'll want to help mitigate that as much as possible with your usual buffs such as Shellga and Protectga. Nichol's Bulwark can help and Sakura's Eternal Veil Limit Burst nullifies damage taken once, so use the means you have to render its rage largely useless.
One thing to note is that Test Rider's stagger meter is surprisingly weak. You can amplify that further with Nichol's Stratagem and/or Sakura's Sage's Eye skill, meaning you can topple Test Rider's enraged state with relative ease.
Meanwhile, Test Rider's attacks include a variety of physical and magic attacks, though its offensive magic is focused on Thunder-type damage. When fully enraged, it will use Golden Lance, which is a single-target physical attack.
There isn't much else to Test Rider's moveset beyond that, so focus on staggering it as often as possible until its beefy health meter is drained.
Once defeated, as before, go save at the nearby Save Point and then go through the door ahead.
Read the stele for your next foe which notes, "The mighty wield blades, the clever command magic. The wise must choose well - or face an end most tragic." Fina helps clarify by saying you'll essentially need to switch between physical and magical damage throughout the fight.
When you're ready, approach the beast on the platform.
Yakhanati will start the fight by immediately using either its Assaulting War Cry or Magic War Cry skill to, respectively, amplify either its physical or magical damage. As mentioned previously at the stele, the initiative here is to switch between physical and magical damage at the right times.
It will always be invulnerable to one or the other at any given time, so pay close attention to which is which. If you use the wrong type of attack it will lash out with a hefty counterattack, similar to Tellus' fight from the last chapter.
Thankfully, you can also tell which type of attack to use based on what Yakhanati is attacking with. If it uses a physical attack, that means you want to attack with magic, and vice versa.
Watch out for physical attacks such as Crush, Body Slam, Bite, Sleep Slash, and Paralysis Fang. Meanwhile, it will also use Thundaga and Stonega as its two primary magic attacks.
Like Test Rider, it has an easier stagger meter to overcome, so stay focused on the correct attacks use, and you'll be able to make surprisingly quick work of this foe.
Once it's defeated, double back to the last Save Point to save and heal up, then use the stairs ahead to proceed to the next area and the next foe.
Examine the stele straight ahead, which states, "If even one endures the strife, know that they shall have eternal life".
The hint for this fight seems tricky, but it's actually right under your nose. Note that you have have two of the same foe here instead of one.
The gimmick is that if one foe falls long before the other, the one that's alive will resurrect the other. The key to overcoming this is to weaken both Arch Gargoyles to the point where you can swifty defeat both before they can resurrect eachother. Ideally, you want to have one or both of them staggered once their health is low, though they're also susceptible to Sleep, which can rob them of a chance to use Revive.
These monsters are weak to both Wind and Light, so focus not only on magical attacks of those types, but ones that hit all enemies present, to ensure their health stays as even as possible. Once they're both low on HP, use your biggest attacks to take them both out at once, or one right before another.
In terms of their moveset, the Arch Gargoyles don't have too much to worry about, aside from their magical attacks Breath Wing, Stonera, and Shamshir. Their physical attacks just include Rake and Rend, so proper buffs will mitigate much of their offensive might. Once felled, head up the stairs to the next area. Ahead the group will arrive at the final monster obstacle. The stele beside it will state, "Impending is a breath most immense - use your time wisely, and prepare your defense." Rain ponders why Gelidus opted to place the Dark Crystal in such a place, and Sakura muses that as someone who's a warrior down to the bone, he likely wants to fight the one who earns the title of Paladin.
Once you have control, heal and rest at the nearby Save Point and then approach the beast on the platform.
The Dragon will immediately start the right with a party-wide Blaze attack and a mysterious countdown will start at "9". This is the buildup to its ultimate attack, which you want to avoid at all costs. Therefore, your goal here is to defeat the Dragon before that happens.
The Dragon's moveset outside that ominous countdown timer is otherwise pretty normal, with attacks like Rend, Body Slam, Fira, and Blizzaga. Buff your party with the usual mitigations such as Shellga and Protectga. However, your key objective here is to make each turn last as long as possible before the timer reaches zero.
You can do that with tactics such as Hastega, Rain's Unity skill, and it's also susceptible to Paralysis. Staggering will help as well, as the Dragon won't get a turn in until you've exhausted that phase. All in all, it's deceptively easy to drag the fight long enough for you to get enough damage in.
The Dragon is weak to Thunder, so bring your biggest wielders of Thunder magic, including Ramuh as a helpful Esper sidekick.
Once the beast is felled, you'll get a brief cutscene with the group before you're allowed to continue onward.
When you can, take the stairs to the next area, which is thankfully rid of big monsters (but not random encounters, so be mindful). Now you'll need to make your way to the top of the room via the various elevator platforms.
Start by taking the elevator on the right up to the first level, then run left to the next elevator. Take that one all the way up to the level second from the top. Run to the right and take the next elevator, which brings you two levels down.
Run to the left and grab the Tablet Shard on the ground, then hop on the next elevator on that side. That one will take you one floor down. Run to the right all the way through the open doorway with torches on either side. Inside is a hidden elevator, so take it. On the next level, run all the way to the left into another hidden passage and open a hidden treasure coffer in there to get a Hero's Blade weapon (grants Bravery for 3 turns at the start of battle) for Rain. Double back and take the elevator in the center of the level up to the topmost level. Save at the Save Point there and then go through the double doors. In the following cutscene, the party will finally emerge in a much larger area of the shrine, though another stele guards the way. Rain inspects it, and it turns out that the final trial that awaits is a duel between the pair who would have made it this far. The spotlight then focuses on both Rain and Lasswell, who had been planning on a duel nonetheless after all was said and done. Rain approaches him on the prospect and Lasswell hesitates. Confused by said hesitation, Rain insists that this is what they've been training for all this time. Lasswell relents but asks for a moment to prepare.
Once you have control again, you'll be free to speak to each of your party members before the fight to get their opinions on the situation. When you're ready, approach Lasswell in the center of the area for an emotional cutscene between the two brothers. Rain encourages Lasswell to come at him with everything he has, though Lasswell still seems to hestitate. An actual encounter then begins between the two, with you in control of Rain. It's mostly a scripted fight, so just push Lasswell's health low enough until it transitions to another cutscene. Rain chastises him for holding back, and Lasswell exclaims that he can't bear to watch Rain stricken with doubt and disappointment in himself, should he overcome him. However, Rain manages to get through to him and the scene culminates in both of them confident enough show eachother their true might. You'll get one more battle encounter between Rain and Lasswell, and you do need to ensure that you stay up long enough to get Lasswell's health low enough until the climax of the battle arrives. Both of them manage to unlock their true power, but in the end, Rain ends up the victor. In the following cutscene, the group reunites with Rain and Lasswell, congratulating them both. Now that Rain has the title of Paladin, it's time to go confront Gelidus. Rain also unlocks The Power Within after that epic fight.
After the dust has settled and Rain has attained the title of Paladin, he's now free to enter the inner chamber of the shrine. Once you have control, save your progress at the nearby Save Point, then go through the double doors ahead.
In the following cutscene, as expected, Gelidus is standing near the Dark Crystal, the only one left. Rain initially offers to duel him one-on-one, but while he does indeed want a fight, Gelidus decides to throw a twist in. The others in the group then arrive, Lasswell saying that they were suddenly allowed in. Gelidus then demands that they all stand against him and prove their worth. With that, your next battle against the rogue of the Sworn Six begins.
Gelidus will start the fight with Mighty Aura, which buffs both his physical and magical attack stats for 5 turns. You'll want to dispel this right away with Nichol or whomever can. As the Veritas of the Frost, he's weak to Fire magic and resistant to Ice, so Fire is the primary element of your offense here.
Brandish your strongest Fire-aligned Visions and bring out Ifrit as your go-to Esper. You can also equip the Solar Pendant to one of your stronger physical attackers (such as Rain), as it'll imbue them with Fire magic.
Gelidus' attacks are not to be trifled with, be they physical or magical. When fully enraged, he'll unleash Glint of Verglas, a single-target, Ice-imbued physical attack that hits twice. There's also Stormbound Smite to watch out for, which lashes the entire party with six hits. Other magical attacks of his include Blizzaga and Absolute Zero. Make sure to keep up your best buffs throughout the fight to help mitigate his worst damage, including Shellga and Protectga. He'll also brandish a variety of physical attacks such as Clobber, Swing Weapon, and Bonebreaker (can inflict Defense Down). He'll also sneak in debuffs occasionally, such as Slowga and Deprotega.
Otherwise, Gelidus' sequence of attack is pretty traditional, free of gimmicks unlike some of your recent encounters. Focus down his stagger meter and be relentless with your strongest Fire-imbued attacks to bring him down as quickly as possible. Once Gelidus is defeated, you'll get a cutscene where the group celebrates their victory. However, that celebration is short-lived as suddenly the remainder of the remainder of the Sworn Eight appears, Umbra at the forefront. He remarks that all eight of them are now in one place, as if perfect timing with the Dark Crystal in their sights. Umbra beckons Gelidus to join them, but instead, he opts to remain on the party's side. Umbra demands to know why, and suddenly, Gelidus removes his helm, revealing himself to be none other than Sir Raegen . This understandably shocks both Rain and Lasswell, and then everyone demands to know the true identity of the Umbra standing before them. Before that can happen, however, an earthquake shakes the land around them, and Sakura warns that the gate is now close to opening. Raegen suggests that Sakura use her teleportation ability to whisk them and the Dark Crystal away to safety. She laments that she doesn't have the power to handle that large of a load, but Archwitch Fina offers her the Divine Signet.
With that, Sakura is then able to vanish them all away in a blink, along with the crystal, leaving the remainder of the Sworn Eight behind.
Want more Final Fantasy Resonance? Check out our hub for helpful details on other features in the game, such as:
Topics in this story
Gathered from external sources. Rights to this text belong to whoever originally published it.